
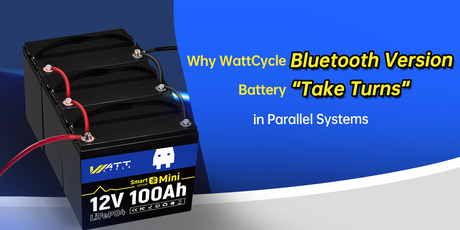
Recently, on many forums, Facebook groups, and the #WattCycle, many users have reported that the WattCycle LiFePO4 batteries with Bluetooth version behaving as if they “take turns” supplying a parallel bus: one battery supplies the load while another appears offline (BMS shows pack voltage higher than bus voltage and 0.0 A discharge). To respond promptly to customer concerns, our engineering team has executed repeatability tests, root-cause analysis and risk assessments, and has prepared interim user guidance and a roadmap for corrective measures. This document is the official technical statement: it clarifies the facts, explains the root cause, provides our safety conclusions, and gives practical operational recommendations. We conclude the behaviour is the expected result of deliberate BMS protection logic (designed to protect individual cells) interacting with parallel system electrical conditions. The behaviour is not a BMS hardware failure and our tests did not identify sustained, dangerous inter-battery charging currents or evidence of thermal/runaway risk.
We will release a firmware/App option (a “parallel high-capacity mode”) to mitigate low-load staggered-wake behaviour by end of September 2025.
Key Takeaway
WattCycle’s BMS intentionally isolates the pack from the external terminals when internal cell state or cell-level protection thresholds indicate charge termination or imbalance. The BMS uses a recovery/hysteresis margin (engineered at ~0.3 V between charge cutoff and re-connection) to prevent rapid repetitive switching near full charge. In parallel systems this protection logic can cause one pack to remain offline until the active pack’s terminal voltage drops enough to meet the protected pack’s re-connection conditions. This is a design trade-off: it prioritizes cell health and safety over enforcing simultaneous terminal participation at all times.
User-reported Key Phenomena
- During charging when the battery bank approaches full state of charge, a WattCycle battery may first enter charge-cutoff (single-cell or battery pack protection triggered). This can result in the other paralleled batteries continuing to be charged to a higher bus/terminal voltage.
- After the system switches to discharge, some users observed that the WattCycle battery does not participate in discharge for a short period (App shows “Discharge: Enabled” but measured current = 0.0 A). The battery only “wakes up” and begins discharging after the paralleled battery pack’s voltage falls by a certain differential.
- The phenomenon is most readily observed under the combination: multiple parallel units + low system load (≤ 50 A) + packs at or near full charge. At higher discharge currents (e.g., 100 A, 200 A, 400 A) the system reaches a state in which all packs discharge concurrently more quickly.
- Some users are concerned about mismatches between the App indicators and actual terminal currents, and about the inability to adjust certain protection thresholds.
Technical Cause Explanation
The following explanation is based on WattCycle BMS design principles and engineering test data; it aims to describe, in technical terms, why the above phenomena occur.
1. BMS protection logic and disconnection mechanism
To protect cell longevity and cell safety, the WattCycle BMS will disconnect the cell pack from the battery terminals via the BMS power switches (MOSFETs) when it detects single-cell over-voltage risk or when the pack is full while significant per-cell imbalance remains. This action blocks further charge/discharge current paths and prevents rapid repetitive charge/discharge or single-cell over-voltage stress.
When the charge-protection MOSFET is in OFF state, the battery terminal voltage may be maintained by the external or other paralleled batteries while the cell pack voltage is isolated. This leads to the observable discrepancy between the terminal voltage and the cell pack voltage reported in the App.
2. Recovery (re-connect) threshold and hysteresis setting
To prevent frequent on/off switching near full-charge (which would stress cells), the BMS enforces a recovery margin (hysteresis) between the charge over-voltage cutoff and the re-connection threshold of approximately 0.3 V at the cell level. This hysteresis prevents rapid repeated conduction toggles when pack voltages hover near the cutoff point, therefore protecting cell health.
Consequently, even if the external bus voltage is higher than the BMS’s internal pack voltage, the BMS will remain disconnected until the pack voltage falls (through discharge or internal balancing) into the re-connection window. This re-connection process takes longer under light loads.
3. MOSFET behaviour, body diode, and isolation topology
The MOSFET(s) in the BMS are the controlled switches that connect/disconnect the cell pack to the battery terminals. Typical implementations use MOSFETs in back-to-back arrangement to block the intrinsic body-diode conduction and achieve robust bidirectional isolation.
When MOSFETs are fully OFF and back-to-back topology is correctly implemented, conduction from the bus into the pack is blocked except via any small bleed paths or monitoring circuits. If a BMS used a single MOSFET or different topology, a body diode could permit one-way current during OFF, this would present different behaviour. WattCycle packs use MOSFET arrangements and logic tuned to prevent unsafe passive charging while still allowing controlled re-connection.
4. Circuit reasons for the “first-on then wake up” behaviour in parallel systems
When multiple battery packs are paralleled and most are in “charge-OFF” status, the system bus voltage is maintained by the bus or the first battery pack that becomes conductive. Once the first pack turns on and supplies the bus, the other packs that remain in “charge protection not yet recovered” state still have their MOSFETs OFF. For those MOSFETs to Turn ON, a triggering condition must be met — the voltage of the active battery pack must drop to a level close to the MOSFET body-diode forward voltage of the not-yet-awake pack, or the not-awake pack’s internal voltage must fall to its BMS re-connection threshold. This requires time, particularly for large-capacity packs under light load where voltage decays slowly.
Over short intervals, any voltage difference may cause brief equalization currents (tens of amps). In our engineering tests we did not observe sustained, high-magnitude battery pack charging currents(i.e., continuous current from one battery into another that would cause protective trips).
Below is a simplified schematic illustration of a typical BMS board:

The circuit primarily controls charging protection and discharging protection through Q1 and Q2 connected in series.
When charging paralleled battery packs, as each pack reaches full, the charging MOSFET (Q1) will be turned OFF for that pack — visible in the App as the “Charging” indicator turning Grey (i.e., charging circuit disconnected). At that moment the charging current path is interrupted.
Charging current path diagram: (Discharging ON, Charging OFF)

Discharging current path diagram:

Please note:
V P+P- = VB+B- - Vab
Normally Vab can range approximately 0.7 V to 1.5 V depending on the (cell pack discharging) current through the Q1 body diode. This is one reason why, when the battery pack reaches protection, the measured terminal voltage can be lower than the internal battery pack voltage reported by the BMS.
During parallel discharge, one pack’s Q1 MOSFET may open first;
The current path for the pack that first turns Q1 ON is as shown in the diagram:

In that state VB+B- ≈ VP+P- and Q1 conducts with almost no voltage difference.
When a paralleled battery bank is in Charging OFF state while another is Charging ON, you can observe that the Charging OFF battery pack’s terminal voltage (due to the body diode voltage) will be lower by roughly 0.7V – 1.5V compared with the Charging ON pack. Following the principle that the higher-voltage source supplies first, the Charging OFF pack will not discharge until the Charging ON pack’s terminal voltage drops by at least ≈0.7V, which at point it becomes possible for the Charging OFF pack to begin discharging.
WattCycle Battery Test Data
WattCycle Technical Support Department performed repeatability discharge tests with three WattCycle packs in parallel. Key results are:
The connection method for parallel operation during the test is as follows:
Please special attention to the connection method of the parallel circuits. Connect the system positive (main +) to Battery A positive (+), and connect the system negative (main −) to Battery C negative (−). Do not take both the system positive and system negative from the same battery.

50 A discharge: first pack SOC ≈ 94% → all three packs begin discharging.
| 50A Discharging | |||
|---|---|---|---|
| Discharging current | 1#capacity(%) | 2#capacity(%) | 3#capacity(%) |
| First battery beginning discharging | 100 | 100 | 100 |
| Second battery beginning discharging | 98 | 100 | 100 |
| Third battery beginning discharging | 94 | 97 | 100 |
100 A discharge: first pack SOC ≈ 93% → all three packs begin discharging.
| 100A Discharging | |||
|---|---|---|---|
| Discharging current | 1#capacity(%) | 2#capacity(%) | 3#capacity(%) |
| First battery beginning discharging | 100 | 100 | 100 |
| Second battery beginning discharging | 96 | 100 | 100 |
| Third battery beginning discharging | 93 | 94 | 100 |
200 A discharge: first pack SOC ≈ 94% → all three packs begin discharging.
| 200A Discharging | |||
|---|---|---|---|
| Discharging current | 1#capacity(%) | 2#capacity(%) | 3#capacity(%) |
| First battery beginning discharging | 100 | 100 | 100 |
| Second battery beginning discharging | 97 | 100 | 100 |
| Third battery beginning discharging | 94 | 94 | 100 |
400 A discharge: first pack SOC ≈ 95% → all three packs begin discharging.
| 400A Discharging | |||
|---|---|---|---|
| Discharging current | 1#capacity(%) | 2#capacity(%) | 3#capacity(%) |
| First battery beginning discharging | 100 | 100 | 100 |
| Second battery beginning discharging | 99 | 100 | 100 |
| Third battery beginning discharging | 95 | 96 | 100 |
Test conclusion (high level): transient non-participation by some packs during parallel discharge does occur, but the state does not persist. When the active pack’s terminal voltage and the non-participating pack’s internal pack voltage differ by approximately 0.5 V, the non-participating pack will begin discharging. Higher discharge currents accelerate the transition to all packs discharging concurrently. No sustained inter-pack charging or protective tripping was observed in these tests.
WattCycle's Official Commitment
User safety first: Based on repeated tests and monitored data, the phenomenon is a repeatable, controlled behaviour produced by the BMS protection logic. In our current engineering evaluation we have found no evidence of sustained inter-pack charging currents, protective trips, or direct safety hazards such as thermal runaway.
Impact on cycle life: The BMS recovery margin and disconnect logic are intentionally designed to avoid frequent charge/discharge cycling near full charge; this approach helps extend cell life. However, in heterogeneous parallel systems (different brands, ages or SoC) it may produce short-term user experience differences.
Compatibility recommendation: To reduce the probability of experiencing this behaviour, we strongly recommend against paralleling WattCycle packs with batteries of different manufacturers, different capacities, or visibly degraded/aged units. Prior to paralleling, ensure all units have similar SoC and similar health status.
Suggestions for Users
Do not mix manufacturers/old & new batteries in permanent parallel unless you ensure that the batteries or cells SoC and health conditions of the batteries are compatible.
Commissioning best practice: Before paralleling, charge each pack individually to the same SoC and allow equalization time; confirm cell voltages within acceptable tolerance.
Cable and wiring: Use short, equal-length parallel bus connections and appropriately sized cable and fusing; high series resistance can increase imbalance and complicate equalization.
Charger configuration: Use specifically designed for LiFePO4 charger. Avoid charging voltages far above recommended targets unless specifically required—excessively high charger voltage increases chance of early single-cell cutoff.
If a pack shows 0.0 A while parallel: Temporarily isolate the external battery (open breaker) to let the isolated battery wake on its own, or follow the App sequence below to force participation. Reconnect and observe; expect a short equalization current spike between batteries in re-connection.
App / Engineering Workaround
For WattCycle batteries parallel setups our engineers recommend the following App procedure to bring all batteries into participation more quickly:
Procedure Overview
In this procedure a small load is applied to the battery bank and each battery becomes the only battery in the bank permitted to power that load (by turning (DSG=OFF) on all the other batteries in the bank). This small load discharges each battery enough to release the Over Charging Protection Condition, allowing the BMS to automatically set (CHG=ON) and releasing the App to toggle (CHG= OFF/ON). A load of 0.05C (5A for a 100Ah battery) is sufficient to release the condition in under 10 Seconds for each battery.
It may be useful for the battery bank to always maintain power to the load, so in this procedure Bat-1 is the last battery to set (DSG=OFF) to force one of the other batteries to take over powering the load and automatically transition to (CHG=ON). Once that battery has transitioned, Bat_1 is manually (via the App) set to (DSG=ON) and the battery that just transitioned to (CHG=ON) is set to (DSG=OFF) so the next battery can be sequenced. In this sequence there is always at least 1 battery set to (DSG=ON) at all times. When Bat_1 is turned (DSG=OFF) there may be a 0.7V dip in the bus voltage until the other transitions to (CHG=ON) and as the battery bank is "fully charged" the voltage will be in the typical around 13.6V momentarily dipping as low as 13.0V (though the Max voltage may be higher for a freshly charged battery without time to return to the "rest voltage").
Note: This procedure can be simplified if the battery bank is not required to maintain power to the load for the duration of this procedure. In this case all the batteries are set to (DSG=OFF) and one at a time each battery is momentarily set (DSG=ON) long enough (about 10 Seconds) for it to discharge that battery sufficiently to trip (CHG=ON). then set (DSG=OFF) on that battery and move to the next battery in the sequence.
For a small battery bank of 2 or 3 batteries, this is a quick procedure, for larger battery banks (of 4 or more batteries) it becomes more time consuming to perform. Also if the battery bank is wired with independant cut off switches/circuit breakers for each battery, it may be quicker to implement with the switches/breakers than using the App.
Note: This procedure is NOT mandatory as a fully charged battery bank will deliver its full capacity without significant voltage disruptions.
For this discussion, assume a battery bank of n batteries, and named Bat-1, Bat-2, . . . Bat-n (Note: these names are just to help describe this procedure, but giving them names on the App is generally helpful).
So this will be an example for a battery bank of 4 batteries. They would be named Bat_1, Bat_2, Bat_3, Bat_4. Note: It would be quicker with 2 Smart Devices (phone/tablet) allowing one Smart Device to be always paired to Bat_1 and the other Smart Device for Bat_2 to Bat_4 (the rest of the batteries in the battery bank).
1. Charge the battery bank so some (or all) the batteries are at charging cutoff (CHG=OFF) "Light Blue".
Note: On WattCycle App (xxx=ON) "Dark Blue", (xxx=OFF) "Light Blue" where (xxx) means either (CHG) Charging button or (DSG) Discharging button.
2. Turn charging power OFF to the battery bank (at the AC/Solar/Inverter charger) so no charging current is going to the battery bank.
3. On Bat_1 set (DSG=ON). And on all other batteries (Bat_2, Bat_3, Bat_4 ... Bat_n) set (DSG=OFF). After about 10 seconds Bat_1 should transition to (CHG=ON) & (DSG=ON) however if this does not happen see step 4.
4. Put a small load on the Battery Bank of about (0.05C to 0.60C) of the C rating of battery making up the battery bank (so for a battery bank of 4x 100Ah batteries, use a load current of 5.0A to 60.0A (for a 12V system that would be 60W to 720W)). Maybe turning on some lights would be enough. At this point after about 10 seconds Bat_1 should go to (CHG=ON) & (DSG=ON).
5. For each Bat_X in the remaining batteries (Bat_2, Bat_3, Bat_4 ... Bat_n) where Bat_n is the last battery in the string:
- A) Bat_X set (DSG=ON)
- B) Bat-1 set (DSG=OFF) and wait (up to 10 Seconds) for Bat_X to transition (CHG=ON).
- C) Bat_1 set (DSG=ON)
- D) Bat_X (DSG=OFF).
6. Set (CHG=ON) & (DSG=ON) for all the batteries in the Battery Bank (Note: Bat_1 should already be (CHG=ON & (DSG=ON) but check anyway).
Increasing sustained load helps wake packs: If the paralleled system shows non-simultaneous discharge under low load, temporarily increasing the load (e.g., starting a large load device within allowed limits) will accelerate the transition to multi-pack discharge.
If you suspect abnormalities or a safety issue: Immediately disconnect the parallel connection and contact WattCycle customer service and technical support, and provide App logs and system monitoring data for engineering analysis.
Official Measures and Following Up Plan
Design intent: WattCycle’s BMS protection logic is designed to prioritise cell safety and service life. Under full-charge conditions the BMS will intentionally disconnect to avoid rapid charge/discharge cycling that can damage individual cells.
Feature improvement plan: We will release a firmware/App update by the end of September 2025 that includes a “Large-Pack Parallel Mode (Parallel Optimization Switch)” option. This mode is intended to improve the responsiveness of multiple large-capacity packs to discharge simultaneously under low continuous loads. The new release will provide more flexible strategies for parallel operation while maintaining protective behaviours for cell safety.
Technical support and user education: In the short term we will distribute detailed parallel-installation and commissioning manuals to channels and distributors, and publish FAQs and instructional videos on our website and forums to guide correct parallel usage and troubleshooting.
Further verification: On request, the company can provide more detailed test data and engineering documentation; if required, remote or on-site technical assistance can be arranged.
Practical FAQ
Will the isolated pack drain into the active pack and cause overcharge/discharge trips?
Under normal wired conditions and with WattCycle topology, we did not observe sustained large-magnitude inter-pack charging currents that trigger protective trips. Short equalization currents during re-connection are normal; persistent destructive currents were not observed.
Can I switch off BMS protections to force passive behaviour?
No. Basic cell-level protections are safety critical and not user disableable. WattCycle will not provide an option to remove fundamental over-voltage or over-current protections.
Is this unique to WattCycle?
Different vendors use different BMS strategies. The observed behaviour stems from the combination of aggressive per-cell protection, hysteresis settings, and parallel system conditions. Other vendors may implement different thresholds or behavior.
I have mixed packs in my RV / boat—what should I do now?
If possible, avoid long-term mixed parallel operation. If immediate change is impractical, ensure all packs are at similar SoC, monitor system behaviour, and contact WattCycle support for guided troubleshooting.
Conclusion
WattCycle designs BMS logic with cell safety and cycle life preservation as the highest priorities. The parallel behaviour reported on forums and FB group is a reproducible interaction between that protection logic and parallel system electrical conditions. We recognize the operational inconvenience this can cause in certain low-load, mixed-pack deployments and are delivering both documentation and a firmware/App mitigation to address it. We appreciate user reports and will continue to publish test data and firmware notes to maintain transparency.


7 comments
Grazie mille per le spiegazioni tecniche, veramente molto aprezzate. Grazie anche per la qualità delle vostre batterie, con cui mi trovo molto bene già da diverso tempo.
The first time in the document where you show the Charging Current Path diagram may have an error. The MOSFETs are in the same state for both the Charging and Discharging circuit diagram. I believe the “Charging current path diagram: (Discharging ON, Charging OFF)” is incorrect and the MOSFET states and the wording " (Discharging ON, Charging OFF)" should be reversed.
I am not sure the discharge results I have seen correspond to your test data. I have two 314Ah minis in parallel, battery cables connected on opposite batteries. I was running my A/C unit and noticed only one battery was discharging. When the A/C first turns on it takes approximately3-9A for about 5 seconds and then the compressor turns on taking 90-105A with a momentary inrush current (250ms) of maybe 200A. After that initial startup, the current will vary as the compressor and fans cycle on and off. The current never goes below 2A, often is 9.5A, with compressor on it is often 90-100A.
Both batteries were at 98% when starting. I noticed that only one battery was taking all of the load current when one battery was at 94% (the other remained at 98%). This continued over the next three hours until the battery reached 64% and the other remained at 98%. At this time I shut the A/C off and started driving the vehicle which provided about 97A of charging current into the 64% battery. the lower battery charged up to about 85% and I shut off the vehicle. The next day I turned on the A/C and the lower (85%) battery provided all of the load as before. I then charged the batteries overnight. The next day when I turned on the A/C both batteries were supplying power about half of the current each as expected.
When the single battery was supplying all of the load the temperature of that battery was higher than it would have been if it had been sharing the load with the other battery. Sharing the load by both batteries is what is expected, this minimized high temperatures and strain by the batteries. Having two batteries is supposed to double the capacity. In this case only one battery was working, thus only half of the expected capacity.
I have 3 of the 12v 314 mini BT batteries. You recommend a method of connecting them across the batteries to load share properly. What are your thoughts on this vrs using a bus bar with same length leads? Which is better for your batteries design?
I have 4 100Ah minis in series and then another set parallel to those equaling 48v of 200Ah. Would this configuration see what is described in the article or only directly parallel configurations?
Can you comment on effects to a two parallel battery installation (which is my boat’s house load battery configuration i.e., two 314 ah bluetooth batteries)? Was there a reason your study/investigation utilized a 3 parallel battery configuration?
Very good info and write up
Very good info and write up